How to use my blog
Hello everyone! My name is Dan Habot, and I'm a developer. I've worked on various applications, websites, and the servers that power them. As a web developer, having a personal website is essential. It's a place to showcase my work, share my thoughts through a blog, and provide a handy list of links. These links are especially useful for networking events where I can easily share my website using a QR code on my business cards or phone. In this post, I'll guide you through creating your personal website using Next.js and deploying it to GitHub Pages
Prerequisites
- Coding Knowledge: This tutorial assumes that you already know how to code. If you're not a programmer, it might be quite challenging.
- A GitHub account.
Step 1: Forking the Repository
First, you'll need to fork the repository I've set up for this tutorial. Here is the link to the repo.
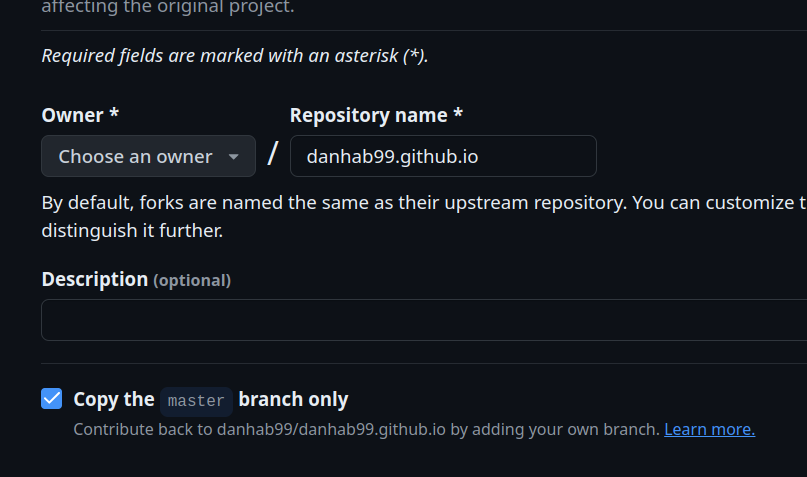
The repository includes GitHub Actions configured for deploying a Next.js app to GitHub Pages. To start, click the Fork button at the top right:

Make sure to rename the repository to [YOUR GITHUB USERNAME HERE].github.io.

Step 2: Enabling GitHub Actions
Next, you'll need to enable GitHub Actions for your forked repository. Click the "Settings" tab, then go to "Actions" on the left sidebar. Ensure that "Allow all actions and reusable workflows" is selected, and click "Save".
Step 3: Deploying to GitHub Pages
Still in the "Settings" tab, find "Pages" a few spots below "Actions". Under "Build and deployment", set the "source" to "GitHub Actions". This allows the Actions pipeline to upload the compiled website to GitHub Pages.
Ensure that Enforce HTTPS is enabled.
Step 4: Customizing Your Website
Full disclosure: this step involves some programming.
The landing page code is in app/page.tsx. Between lines 30 and 85, you'll find repeating <Card blocks. These represent the link cards on the landing page.
<Card
  title="Email"
  color="red"
  icon={IoMdMail}
  label="dan.habot@gmail.com"
  link="mailto:dan.habot@gmail.com"
/>
title="": The text at the top of the card.color="": Colors can be customized using Tailwind CSS colors.label="": The text at the bottom of the card.link="": The URL or email.
To set different icons, choose one from the React Icons website. Copy the icon's name (using the second button from the top in the side panel) and paste it into the list of icons on line 14 and within the icon= curly braces (without quotes).
Writing Blog Posts
Blog posts are a combination of a YAML file and a Markdown file. To start, create a new .md file in the blogs/ directory. The file name will be the link to the blog.
The format of the file is as follows:
title: BLOG TITLE HERE
description: BLOG DESCRIPTION HERE
createdAt: YYYY/MM/DD

---

## Write your blog here
Once you commit and push a new blog, GitHub Actions will build the blog page and publish it for everyone to read.
Conclusion
I hope this tutorial helps you set up your personal website and start sharing your work and thoughts. If you have any questions, feel free to email me at dan.habot@gmail.com, and I'll get back to you as soon as I can.
Editted by chatgpt